Investigating Apigility
At ZendCon 2013, Zend announced Apigility which is intended to ease the creation of APIs.
It consists of these things:
- A set of ZF2 modules that do the heavy lifting of creating an API
- A application wrapper for creating standalone web API applications
- A built-in administration website for use in development to define the API
Rather nicely, it supports REST and RPC and deal with error handling, versioning & content negotiation for you.
Getting started from nothing to create a new API is quite easy: you simply install the Apigility Skeleton Application following the the instructions in the README and then create your new APIs using the admin application.
The more interesting case for me is how to use Apigility to supply an API to an existing application, so I’m going to explore how to do this.
Let’s start by adding an API to the ZF2 tutorial application.
Install the tutorial application
The easiest way to do this is to use my zf2-tutorial-to-go GitHub repository. Just follow the instructions in the README to set it up. (Make sure that you use PHP 5.4+ so you can use the built in web server.)
Add Apigility
To add Apigility to our application we update composer.json:
We set the minimum stability and add a new repository and then add some packages to the require and require-dev sections.
Update the entire composer.json so that it contains:
{
    "name": "akrabat/zf2-tutorial-apigility",
    "description": "ZF2 Tutorial with Apigility",
    "license": "BSD-3-Clause",
    "minimum-stability": "dev",
    "repositories": [
        { "type": "composer",
          "url": "https://packages.zendframework.com" }
    ],
    "require": {
        "php": ">=5.3.3",
        "zendframework/zendframework": "dev-develop",
        "zfcampus/zf-apigility": "dev-master"
    },
    "require-dev": {
        "zendframework/zftool": "dev-master",
        "zendframework/zend-developer-tools": "dev-master",
        "zfcampus/zf-apigility-admin": "dev-master"
    }
}
and run composer:
$ php composer.phar update
Once it’s finished, we can update our application.
Update the application
There are a number of things we need to do to update our application to support Apigility.
Firstly, we need to add the modules, but some of them are development only and not intended for production. One way to do support this is to provide a separate config/development.config file that is only loaded if it exists and then ensure that this file isn’t deployed to production.
To support this, we modify public/index.php:
Replace:
// Run the application!
ZendMvcApplication::init(require 'config/application.config.php')->run();
with
$appConfig = require 'config/application.config.php';
if (file_exists('config/development.config.php')) {
    $appConfig = Zend\Stdlib\ArrayUtils::merge($appConfig, require 'config/development.config.php');
}

// Run the application!
ZendMvcApplication::init($appConfig)->run();
As you can see, this simply checks for the presence of development.config.php and merges it.
We can now add our modules. Firstly add the following modules to config/application.config.php:
    'ZF\Apigility',
    'AssetManager',
    'ZF\ApiProblem',
    'ZF\Hal',
    'ZF\ContentNegotiation',
    'ZF\Rest',
    'ZF\Configuration',
    'ZF\Versioning',
And then create config/development.config.php with the following contents:
< ?php
// NOTE: DO NOT deploy this file to LIVE

return array(
    'modules' => array(
        'ZFTool',
        'ZF\Apigility\Admin',
    ),
);
Within Apigility, the DB-Connected functionality relies on ZF2’s Adapter\AbstractServiceFactory, so we need to register this with the Service Manager. The easiest place to do this is in config/autoload/global.php.
Update config/global.php and add:
        'abstract_factories' => array(
           'Zend\\Db\\Adapter\\AdapterAbstractServiceFactory',
        ),
within the 'service_manager' array.
As we’re in development mode, we can now start up Apigility’s admin system and define an API for our albums. From the command line, in the application’s base directory you can start the PHP internal web server using:
$ php -S 0.0.0.0:8080 -t public/ public/index.php
and then navigate to http://localhost:8080 to see a list of albums and http://localhost:8080/admin to see the Apigility admin:
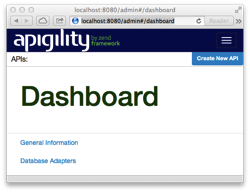
Use Apigility admin to create an API
The simplest API to create with Apigility is a DB-Connected one. In this model, we tell Apigility how to connect to our database and it generates an API for us.
The first part of this to create a database adapter for apigility’s use.
Click on the Database Adapters link on the admin dashboard and press the Create New DB Adapter button.
Enter the following into the Create new DB Adapter form:
- Adapter Name: DBAlbum
- Driver Type: Pdo_Sqlite
- Database: data/album.sqlite
And then press the Create Db Adapter button to create our new adapter.
We can now create an API, so press the Create New API button in the top right of the admin. Enter AlbumApi into the form field and press the Create API button.
This creates version 1 of our API and we now need to create a service. We will create a REST service, so click on the REST Services link and then click the Create New REST Service button.
Choose the DB-Connected tab and then fill out the form:
- DB Adapter Name: DBAlbum
- Table Name: album
Press the Create DB-Connected REST Service button to create the service.
We now need to set our new service up correctly, so click on the AlbumApiV1RestAlbumAlbumEntity link and select the Edit tab.
Firstly we update the route as we already have a /album route. Update Route to match to be /api/album[/:id]
Also, in the REST Parameters section change the Identifier Name from album_id to id.
Finally, press the Save button.
(Note that I had trouble with the Identifer Name reverting back to to album_id, so I edited module/AlbumApi/config/module.config.php and replaced all instances of album_id with id and that solved it. I assume that this is a minor bug somewhere in the admin system.)
You can also edit other aspects of your API here. I particularly like that you can choose which HTTP verbs that your API responds to, so to make a read-only API, you could simply uncheck all verbs other than GET.
Test your new API
I use curl on the command line for testing things:
curl -s -H "Accept: application/json"
http://localhost:8080/api/album | python -mjson.tool
And you should see a nicely formatted list of albums with HAL links.
GitHub repository
I have created a GitHub repository called zf2-tutorial-apigility which contains the code. The master branch is the fully working DB-connected API and the base tag is at the point before we used the Apigility admin system.
Conclusion
Apigility doesn’t seem too hard to integrate into an existing ZF2 application after all. I particularly like that the admin system is development only and the code it creates can be checked into your VCS for easy inspection of what it has done.
Obviously a DB-connected resource is a very simply integration, but I’m pleased to see that Apigility has provided an AlbumCollection.php and an AlbumEntity.php file with the AlbumApi module to allow for customisation.
Given that Apigility was announced at ZendCon, I’m fairly confident that more work will be done the project and I look forward to new features such as authentication and validation that are sure to be coming soon.


Thanks for sharing your Apigility experience with us. Useful/informative!