Displaying exif information in WordPress posts
After discovering that WordPress modifies img tags when rendering a page, it crossed my mind that I could display exif information underneath each image on my new photography blog. The basic process is applicable to any manipulation of the content that you would want to do before it is displayed.
To do this, we add a new filter to the the_content hook:
add_filter('the_content', function ($content) {
	// manipulate $content
	return $content;
});
As with all filters, we have to return data in the same format as the first parameter to our function. For the_content, we receive a string which is the post’s article text.
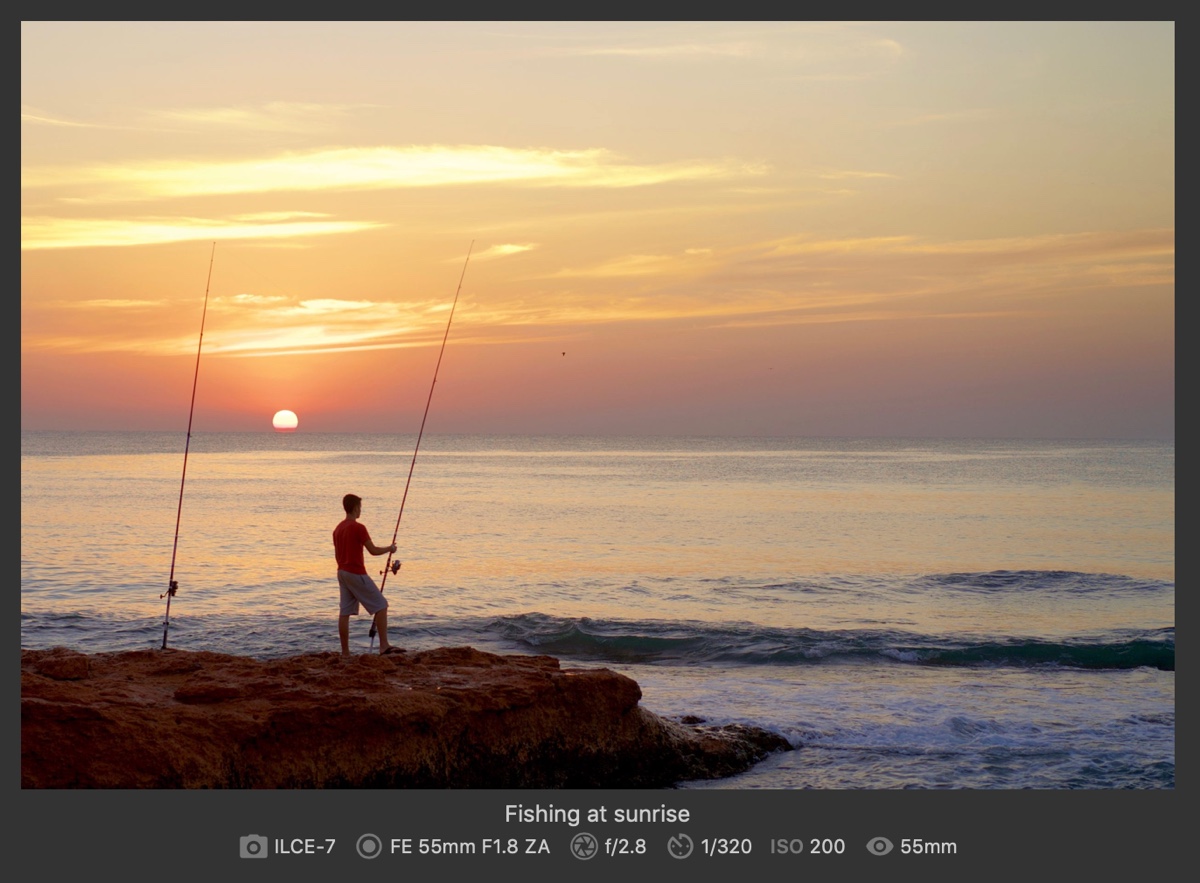
In my case, all my <img> tags are immediately followed by a <figcaption> tag as I have a caption under each one. I decided to add the exif data within the <figcaption>. We use regex to find the tags: This will store each <img> tag that’s followed by a <figcaption> tag into the $matches variable, so we can now iterate over it: This code iterates over each match and finds the url in the src attribute of the image tag. We can then then load the post from that url using the rather helpful $postId = attachment_url_to_postid($url);. Now that we have an ID, we can create the EXIF caption in a separate function and then finally we append it to the end of the current caption. We do this by simply replacing the closing </figcaption> with our text followed by </figcaption> which is a nice fast operation. To create the string of EXIF data, I used a separate function to make it easier. WordPress has already extracted the EXIF data we require when the image was uploaded into the admin, so we simply need to read it and format it. To get it we do this: $imagemeta is an array of useful characteristics about the image. We pull the info we care into a set of variables like this: (Obviously, if there is no data, there’s nothing to do.) Finally we format it nicely: We wrap our entire EXIF string in an <aside> tag so that we can style appropriately. Then for each item of data, we display an icon followed by the text information. The icons are Ionicons which are SVG and easily integrated. When WordPress renders a page with an image, our code will add EXIF data to the figcaption and I get pictures on my blog displayed like this: As you can see, I took this photo with my old Sony A7, using a 55mm lens. I used an aperture of f/2.8 with a shutter speed of 1/320 seconds at ISO 200. As this is a prime lens, the focal length matches the lens description of 55m, however for a zoom lens, I would see exactly what zoom level I had picked. All in all, it’s really easy to programmatically change the output of a post id it displayed and I’m sure you can think of many other uses of the technique.
if (!preg_match_all( '@img [^>]+><figcaption>[^<]*</figcaption>@', $content, $matches)) {
  return $content;
}
foreach ($matches[0] as $match) {
// Find the url in the
Creating EXIF display string
$metadata = wp_get_attachment_metadata($postId);
if (!isset($metadata['image_meta'])) {
  return '';
}
$imagemeta = $meta['image_meta'] ?? [];
$camera       = $imagemeta['camera'] ?? null;
$lens         = $imagemeta['lens'] ?? null;
$aperture     = $imagemeta['aperture'] ?? null;
$shutter      = $imagemeta['shutter_speed'] ?? null;
$iso          = $imagemeta['iso'] ?? null;
$focal_length = $imagemeta['focal_length'] ?? null;

if (! ($camera || $lens || $aperture || $shutter || $iso || $focal_length)) {
  return '';
}
$string = '<aside class="exif">';

if ($camera) {
  $string .= '<div><ion-icon name="camera"></ion-icon><span>'.$camera.'</span></div>';
}
if ($lens) {
  $string .='<div><ion-icon name="radio-button-on"></ion-icon><span>'.$lens.'</span></div>';
}

if ($aperture) {
  $aperture = 'f/' . $aperture;
  $string .= '<div><ion-icon name="aperture"></ion-icon><span>'.$aperture.'</span></div>';
}

if ($shutter) {
  $shutter = '1/' . (int)(1.0/(float)$shutter);
  $string .= '<div><ion-icon name="timer"></ion-icon><span>'.$shutter.'</span></div>';
}

if ($iso) {
  $string .= '<div><span class="text-icon">ISO</span><span>'.$iso.'</span></div>';
}

if ($focal_length) {
  $focal_length = (string)(round((float)$focal_length)) . 'mm';
  $string .= '<div><ion-icon name="eye"></ion-icon><span>'.$focal_length.'</span></div>';
}

$string .= '</aside>';
return $string;
Final output


I would like to use your code to display EXIF information on my photos, like you did, on my photography website. I like the display. but I am unable to understand how to use it in my current theme. Can you please make easier for me to understand which code goes where and how I will be able to use it. Or any plugin you have made for it.
Thank you.